Your fingers are numb. You can see your breath inside your tiny home. And your heating bill just hit $150 for a 200-square-foot space.
Tiny homes lose heat faster than regular houses; more walls and roof per square foot means heat escapes quickly. With heating costs increasing by 7.6% in 2025, keeping your small space warm can be expensive. Drafty windows and thin walls make it worse.
Most winterizing advice doesn’t work for tiny homes. Heavy insulation projects are too invasive. Industrial heaters won’t fit.
Here are seven proven methods to keep your tiny home warm winter after winter. From $15 fixes to smart insulation tricks designed for compact spaces. Real solutions that work in 2025.
7 Easy Ways To Keep Your Tiny Home Warm This Winter

#1. Seal Air Leaks (They’re Stealing Your Heat)
Air sealing beats insulation every time. A well-sealed house with average insulation will outperform a leaky house with excellent insulation, and drafts are wasting 5% to 30% of your heating energy right now.
Where Tiny Homes Leak Heat
Tiny homes have unique leak points that regular houses don’t face. Check these spots first:
Window and door frames: Where the frame meets your walls, gaps let in cold air. Run your hand around each window on a windy day, and you’ll feel the drafts.
Wheel wells: The space where your trailer wheels sit creates gaps underneath. These are massive heat thieves.
Utility penetrations: Everywhere a pipe, wire, or vent enters your home is a potential leak. Look at your electrical outlets, plumbing entries, and exhaust fans.
Material transitions: Where wood meets metal, or siding meets windows, gaps form naturally. These junction points need attention.
Your Weatherstripping Toolkit
Start with caulk for stationary gaps around window frames and where siding meets trim. Use silicone-based caulk for exterior work; it handles temperature swings better.
Weatherstripping tape seals movable joints like doors and operable windows. The adhesive-backed foam works for gaps under ¼ inch.
Expanding foam fills larger gaps around pipes and utility entries. Get the low-expansion type. Regular expanding foam can warp your frames.
The Right Order for Draft Prevention
For tiny house insulation to work effectively, seal first, then insulate. Even the best insulation fails when air flows around it.
Start with the biggest leaks; wheel wells and door bottoms usually win. Then tackle windows. Finally, hunt down the small stuff like outlets and pipe penetrations. You’ll feel the difference immediately, and your heating bills will drop within the first month.
#2. Add Thermal Curtains (Cut Heat Loss By 25%)
")
Windows lose 10-25% of your home’s thermal energy. In a tiny home where every square foot of wall space might have a window, that percentage climbs even higher. About 30% of your heating energy is escaping through glass right now.
How Thermal Curtains Work
Thermal curtains use a three-layer construction to trap dead air between your window and living space. The outer decorative layer faces your room. The middle layer is dense foam or felt that blocks airflow. The inner layer is usually a light-colored backing that reflects heat into your room in winter and bounces solar heat out in summer.
This simple setup can reduce heating costs by up to 25% while saving you money year-round on cooling, too.
Installation Strategy for Maximum Savings

Mount curtains as close to the window as possible. The tighter the seal around the edges, the better your thermal insulation performs. Use wraparound rods or tracks that minimize gaps at the sides.
Keep curtains closed on windows not receiving direct sunlight during winter days. If the sun is hitting a window, open the curtains; free solar heating beats any curtain. Close them again at sunset to trap that warmth inside.
Energy Efficient Windows on a Budget
Can’t afford new energy-efficient windows? Thermal curtains are your best alternative. At $20-$100 per panel, most thermal curtains pay for themselves in 1-2 heating seasons through reduced energy bills.
What to Buy
Look for curtains labeled with an R-value (thermal resistance rating). Anything above R-3 works well. Triple-weave or multiple-layer curtains outperform single-layer blackout curtains.
Measure carefully. Curtains should extend 4-6 inches beyond the window frame on all sides for proper coverage. Floor-length works best, creating a sealed pocket of insulating air.
For maximum impact in a small space, prioritize your largest windows and those on the side facing the prevailing winter winds. Two well-placed thermal curtains can reduce heating costs more effectively than covering every small window in your tiny home.
#3. Pick The Right Heater For Your Space
The wrong heater will either waste energy or leave you shivering. Optimal heating output for tiny homes is about 3,000 BTUs; much less than most heating systems deliver. Oversize your heater and you’ll cycle on and off constantly, wasting energy and creating temperature swings.
Electric Space Heaters: Simple On-Grid Solutions

Standard electric space heaters max out at 1,500 watts (roughly 5,100 BTUs) due to circuit limitations. They’re plug-and-play tiny house heating solutions for anyone with shore power.
Forced air heaters heat spaces quickly but run loudly. They’re ideal if you’re home for short periods and want fast warmth.
Radiant heaters work silently, warming objects and people directly rather than air. Perfect for constant occupancy; you’ll feel comfortable at lower thermostat settings.
Both types cost $30-$150 and work in any tiny home with electrical hookups.
Mini Split Systems: The Premium Choice

A mini split heat pump offers dual heating and cooling in one compact unit. The indoor unit mounts on your wall (takes up no floor space), while the compressor sits outside.
Mini splits are incredibly efficient, moving heat rather than generating it. They’ll heat your space in winter and cool it in summer. Expect to pay $1,500-$3,000 installed, but energy savings add up fast. Many tiny home owners report cutting heating costs by 40-50% compared to resistance heaters.
The catch? You need exterior wall space for installation and electrical capacity for the system.
Wood Stoves: Off-Grid Reliable Heat

Wood stoves provide reliable backup heating and work completely off-grid. Two models sized specifically for small spaces: Hobbit Wood Stoves (designed for boats and tiny homes) and Jotul 602 (classic compact design).
Both require 12-18 inches of clearance from combustible walls, which is a big ask in 200 square feet. Heat shields can reduce this clearance to 6-8 inches.
Wood stoves cost $800-$2,000 plus installation. You’ll need proper venting through your roof and a non-combustible floor pad.
Propane Heaters

Propane wall heaters and vented units work off-grid without the clearance demands of wood stoves. They’re quieter than wood heat and thermostat-controlled. Expect to use 1-2 gallons per day in cold weather at $3-$4 per gallon.
Match Your Setup
On-grid with space? Mini split wins for efficiency. On-grid and tight on cash? The electric space heater works fine. Off-grid? Propane or wood, based on your clearance space and fuel access.
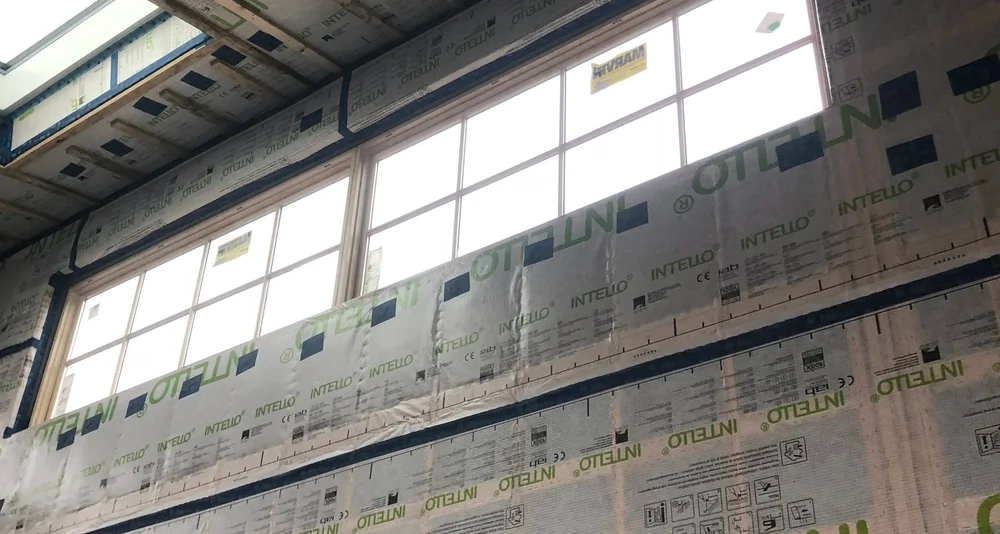
#4. Boost Your Insulation

Proper insulation reduces heating bills by approximately 30%, but in a tiny home, every inch counts. You need maximum R-value insulation without sacrificing precious living space.
Minimum R-Values for Cold Climates
Tiny house RVs need R-17 to R-18 minimum for extreme cold. That’s the baseline. Canadian winters demand even more, especially in walls and ceilings where heat rises and escapes.
Best Insulation Materials for Heat Retention

Closed-cell spray foam provides R6-8 per inch, the highest R-value per thickness available. It also seals air gaps while insulating, giving you two benefits in one application. The downside? Professional installation costs $1.50-$3 per square foot.
Rockwool stays warm in the coldest winters because it doesn’t compress and blocks air movement better than fiberglass. Fiberglass allows air movement through its fibers, reducing its effective R-value. Rockwool batts cost more upfront but perform better long-term.
Where to Focus Your Efforts
Floor insulation matters most because cold rises from below. Trailer floors need 3 inches of insulation plus a vapor barrier (adds 3R to your total). Use rigid foam boards between floor joists; they pack high R-value into minimal thickness. XPS foam boards deliver R-5 per inch.
Wall cavities in most tiny homes are 2×4 construction (3.5 inches deep). Fill these. Spray foam works best, but Rockwool batts are the DIY-friendly option.
Ceiling insulation should hit R-30 minimum if possible. Heat rises, so your ceiling loses the most energy. If you can’t fit R-30, get as close as possible.
Don’t Forget the Obvious
Doors and windows remain primary heat loss areas even after wall insulation. Double or triple-glazed windows are required in Canadian winters; single-pane glass negates all your insulation work.
Insulated exterior doors (fiberglass or steel with foam cores) beat wood hollow-core doors by R-10 or more.
The Reality Check
Adding insulation after construction means tearing into walls. If you’re building new, max out insulation now. If retrofitting, focus on accessible areas: under-floor from below, attic/loft spaces, and around doors and windows where you’ll see the biggest return.
#5. Install Skirting (Stop Cold Air Underneath)
The trailer floor is always the coldest part of your tiny home. Even with floor insulation, you’re losing heat to wind flowing underneath.
Why Skirting Matters
Wind moving under your tiny home on wheels removes heat faster than still air. It’s called convective heat loss; cold air sweeps away warmth before your insulation can work. Skirting creates a warm zone under your home, stopping this wind effect.
In extreme cold climates, skirting isn’t optional. Without it, your floor will stay freezing no matter how many heaters you run.
Thermal Bridging: The Hidden Problem

Metal trailer frames create thermal bridging; they transfer heat directly outside, bypassing your insulation. Your floor joists sit on this cold metal, conducting heat downward. Skirting reduces this effect by keeping the air under your home warmer than outside temperatures.
What to Use for Skirting
Insulated panels work best for tiny homes on wheels. Rigid foam boards (1-2 inches thick) attach to your trailer frame. They prevent heat loss while staying lightweight.
Alternative materials: vinyl skirting, corrugated metal panels, or plywood with insulation behind it. Whatever you choose, make it removable for travel.
Add Inside Protection Too
Insulated baseboards inside your home create a second barrier. They stop cold from radiating up through your floor into the living space.
Critical: Include Ventilation
Seal your skirting completely, and you’ll trap moisture underneath. This causes mold, rust, and attracts rodents looking for warm shelter. Install small vents (cover with mesh to keep pests out) or leave 2-3 inch gaps every 10 feet. You want minimal airflow; enough to prevent moisture, not enough to create wind tunnels.
Proper skirting combined with good floor insulation can prevent heat loss equivalent to 15-20% of your heating costs.
#6. Control Moisture (Keep It Dry And Warm)
Condensation is a common issue in tiny homes. Small spaces heat up fast, but they also trap moisture from cooking, showering, and breathing. That moisture hits cold windows and walls, creating drips, mold, and that clammy feeling that makes you feel colder than the actual temperature.
The Ventilation System Solution

An energy recovery ventilator (ERV) solves moisture control without wasting heat. It transfers heat and moisture between outgoing stale air and incoming fresh air. You get air circulation and fresh oxygen without losing heating energy through an open window.
ERVs cost $500-$1,500 installed but pay off in improved air quality and reduced heating costs. They’re essential in highly insulated spaces where natural air exchange is minimal.
Simple Daily Moisture Control
Keep a window or skylight vented when possible, even just a crack. Yes, you’ll lose some heat, but trapping moisture causes bigger problems. Proper ventilation prevents mold that ruins insulation and makes spaces unhealthy.
Stay dry before entering your home. Shake off snow, remove wet boots at the door, and hang damp coats near a vent. Each person brings in surprising amounts of moisture.
Use Ceiling Fans Year-Round

Ceiling fans aren’t just for summer. Run them on low in winter (clockwise direction) to push warm air down from your ceiling. This air circulation prevents hot, humid air from pooling at the top, where it condenses on cold surfaces.
Heat Sources That Dry Air
Wood stoves act as dehumidifiers—they consume moisture as part of combustion. If you’re burning wood, you’re naturally drying your space.
No wood stove? Consider an electric dehumidifier for winter. Small units (30-50 pint capacity) cost $150-$300 and pull gallons of water from your air weekly. Empty them daily to keep moisture under control.
#7. Use Smart Heating Habits (Save Money Daily)
Average winter heating costs hit $976 in 2025, up 7.6% from last year. Electric heating costs jumped 10.2%. In a tiny home, smart daily habits can reduce energy bills by 15-30% without spending a dollar on equipment.
Adjust Your Water Heater

Turn down your water heater to 120°F. Most come set at 140°F, hotter than necessary, and waste energy every hour. This single change saves $20-40 per winter in a tiny home.
Master Your Window Coverings
Open curtains on south-facing windows during sunny days. Free solar heat can raise your interior temperature 5-10 degrees. Close them at sunset to trap that warmth.
Studies show 75% of people never adjust window coverings daily. That’s leaving money on the table. Make it a morning and evening routine—open at sunrise, close at sunset.
Use Ceiling Fans Correctly
Run ceiling fans clockwise on low speed during winter. This pushes warm air down from your ceiling, where it pools uselessly. You’ll feel 2-3 degrees warmer at floor level, letting you lower your thermostat.
Smart Thermostat Management

Lower the temperature by a few degrees when away for more than 4 hours. Each degree down saves roughly 3% on heating costs. In a tiny home that heats and cools quickly, you won’t wait long for it to warm back up.
Don’t lower it at night if you’re home; tiny homes lose heat fast, and reheating in the morning uses more energy than maintaining temperature.
Maintenance Matters for Winter Energy Savings
Change or clean filters monthly during heating season. Clogged filters make heaters work 15-20% harder, burning extra energy for the same warmth.
Power Outage Prep

Keep a backup generator or portable power station. Winter power outages in a tiny home turn dangerous fast, and small spaces cool to outside temperatures within hours. A small 2,000-watt generator runs a space heater safely.
Conclusion
Keeping your tiny home warm comes down to stopping heat loss and choosing the right heating source. Start with cheap fixes: seal air leaks and add thermal curtains for under $100. Then tackle your heater, insulation, and skirting.
These seven methods work together. Skirting stops cold air underneath. Thermal curtains trap heat inside. Proper ventilation prevents moisture that makes you feel colder. Smart habits multiply your savings.
Start this weekend with one change. Seal your biggest drafts or hang thermal curtains. Track your heating bills and add another method next month.
Your tiny home can stay warm all winter without breaking your budget. Pick one method today.